Pages

Showing posts with label Halloween. Show all posts

Tuesday, October 25, 2016

Halloween Pumpkin Treats


These were the cute little make n takes we did at the Big Shot Workshop on Friday, October 7th.

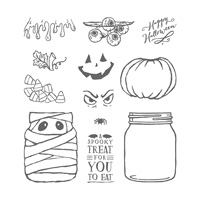
You can also use the same stamp set and do a mummy treat box.

They are so easy to do and you can have quite a few ready for those special little Trick or Treaters that come to your door!

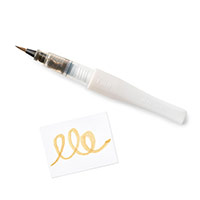
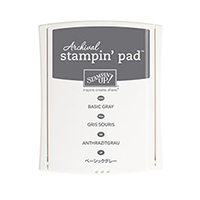
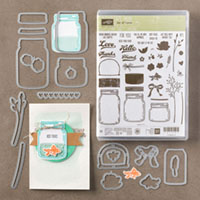
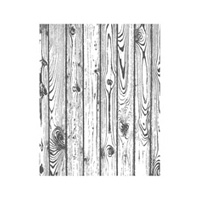
Using Pumpkin Pie card stock, cut out two medium size jars and then stamp them with the Hardwood stamp using Pumpkin Pie ink.  Also stamp two jar lids in Basic Gray and cut them out using the jar lid framelit.   Highlight the jar lids using the Gold Wink of Stella pen.

Stamp the pumpkin face using Basic Black ink on one jar. Highlight the eyes and mouth with the Gold Wink of Stella pen.

Add the jar lids to the pmpkin jars.

Create the little inside box for your Hershey Nuggets. Using a 3 1/2" x 3 piece of Pumpkin Pie Card stock, and with the 3 1/2" side at the top of your scoring tool, score at 1" and 2 1/2".  With the 3" side at the top of your score board, score at 1" and 2".  Cut on the score lines up to the fold line on each of the folds on the 3 1/2" side.  Put your box together using Fast Fuse Adhesive.  Add your treats to the box.  I used 2 Hershey Nuggets but you could use any candy of the same size.

Then, adhere your pumpkin die cuts to the outsides of the box using Fast Fuse Adhesive.

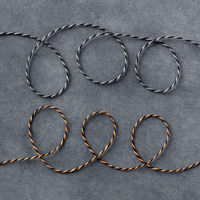
Using the Halloween Night Baker's Twine, wrap around top of pumpkin and tie a bow.

You can secure the top of your jar lids with a little snail adhesive to keep it closed.  NOT that it will stay that way long :-)

Have fun making these adorable treats!!!

I am listing the supplies used below!


Wednesday, October 9, 2013

Halloween cards


We did this adorable mummy card at class in September.  It is just torn strips of card stock layered and sponged with brown ink.  We put a little square of black card stock behind with two googly eyes to peek through.

Fun, easy card......

Here is one I did a few years ago....pretty similar.

This was done by putting the eyes on first and then layering the strips of card stock over the card.

And, yet another fun Halloween project to do is to use gauze and cover a Hershey bar.....and add eyes and a little note card.

Have fun creating!!!

Hugs,
Char

Wednesday, September 4, 2013

Halloween is a comin


I received the card below from my friend, Rita Holmes.  Rita used Amuse Studio stamps, die cuts, card stock and designer paper.  Isn't it just the cutest card????  I love how she did it so that the top flap comes up (I should have taken a photo to show that).  The little ghost hides behind the scalloped circle.  And, under the flap, she stamped "Happy Haunting".  I just love Amuse's dotted and chevron card stock.

This set is in the new 2013 holiday catalog and inspiration guide.  It's on page 9.  Of course, if you don't have a catalog, you can always contact Rita or go to her website here.

Anyway, the stamp set is $16.99 and the die set is $10.99.  You don't have to use the same papers she did....but they sure are cute together.

We are taking our Granddaughter to the Pumpkin Patch in October and she is getting really excited and calls us more often than usual.  She just can hardly wait!!

So, I thought I would start sending her a card each week, building up to the day!!

I decided to use Rita's idea for my card.....seeing how I haven't ordered the stamp/die set yet, I had to use things I had around here. Believe it or not, I don't have a ghost stamp.  I rarely do Halloween cards except to send to my Granddaughters.  So, I used the Pumpkin Die set from Sizzix and then used stickers for his eyes and mouth and a ghost sticker and a Spooky sticker.

It's always fun to get a new card shape or layering idea.

Thanks Rita!!!

Have a great day!!!

Char


Monday, November 7, 2011

Fabulous Raks

How fun it is to receive cards in the mail!!!  Not only does it make your day, but it's a great way to get new ideas and see how different people select different components for a card.  I never cease to be amazed at all the wonderful talent out there.

Here is a card I received in a swap I participated in.  This one is from Joanne.  We were to do a Magic Snowflake Technique but we didn't have to use snowflakes.  I love all the soft muted colors and how they coordinate with the papers she used.
 I received this adorable Halloween card from Andrea.   Too stinkin cute!!!!
 This card came from Nancy.   Look at the Pumpkin background and all the individual elements to this card.  Much cuter than my camera depicts.
 And, last but definitely not least, Channie sent me this card.  Oh gosh...so many fun details to this card.  You really have to see it up close and personal to really appreciate all the extra work that went into this card.

Thank you all....what fun to go to the mailbox and see something in there besides bills!!!

Sunday, November 1, 2009

Another Halloween Treat


Ok, another Halloween treat because I didn't have access to photos earlier!!!

Truly, I AM working on something other than Halloween, now. I'll be posting more later. I need to hook up with my camera toting friend, again :-)

These little spiders were a blast to make. I did them in bright orange and black (the orange didn't show up too good) and made some others in Pink and black. They hold a little Mint inside. Didn't they used to make Mints that were ROUND??? I couldn't find any that were packaged round....but oh well, they worked!!

My stamping buddy, Richard, did some really COOOOL ones....but alas...I didn't get any photos of them. They were silver and black and shiny! And, naturally, being a man....they tend to be more on 'technical' side and he gave his spiders 8 legs!! I was making mine with four...and comprised and made them with 6.

I don't think kids will look at them long enough to notice...do you?

Char