Here is the card we did for class the first of January. I was basically trying to teach the technique, which was using packing tape to get the glitter effect on the heart. But, later, decided it needed some 'pizazz' so I added the extra stamping to the front.
Afterwards, I thought, hmmm, maybe just stamping around the heart and leaving the sentiment free. That will be my next try :-)
Here are the directions, if you would like to try it.
Stamp Set: Sealed with Love #142815
Card stock: Real Red 8 ½ x 5 ½, scored at 4 ¼. Whisper White 3 ¾ x 5, scored on all sides at
¼”
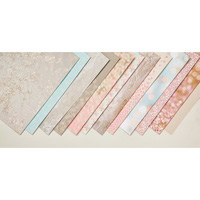
Designer Series Paper: Sending Love, #142733, 3”x3”
Scrap Cardstock: 4x5 ¼, cut
out of scrap card stock using heart Framelit, to be used as a template
Ink: Real Red
Framelits: Sweet and Sassy
Framelit Dies #141707 (2nd one in the 3 Framelit set)
Other supplies:
Ribbon: Real Red stitched satin ribbon #141693,
approximately 15”
Silicone
Sheet #127853
3” Packing
Tape
Dazzling
Diamonds glitter #133751
Glue Dots
Directions:
- Score Whisper White on all four sides at ¼”
- Stamp Sentiment just above bottom score line.
- Using template that you created, using the Sassy Heart Framelit, line it up on Whisper White card stock and run it through the Big Shot.
- Using a Silicon Sheet, lay white card stock face down.
- Lay a strip of 3" packing tape over the opening, sticky side down.
- Turn card over and carefully sprinkle Dazzling Diamonds onto the sticky side.
- Tape a 3x3" square of Designer Series Paper over the back of the heart opening so the design shows through to the front of the card.
- With Real Red ink, stamp image around heart as pictured.
- Attach to Real Red card.
- Add strip of ribbon from center of top of heart and secure behind. Add bow to top of heart using a glue dot.


