Pages

Sunday, December 25, 2016

MERRY CHRISTMAS!!!!


Wish you all a wonderful Christmas Day!!!  Remember the Reason for the Season!!!

Hugs,
Char

Saturday, December 24, 2016

Christmas Eve!!!

Here is a card we did at class on December 1st.  It is called a Twist Card or at least that is what I call it.  A little different than the normal cards I make, although I LOVE to make different folded cards, this one has a little 'mechanism' out of card stock that enables it to fold into itself when you close it.

Just so you know, thought, one of my class members sent it to someone and it cost $2 to mail it!  So, it's not a card you would send to a long list of people but maybe for a special occasion.


It's Christmas Eve!!!  So, we'll be going to a service at church this evening, drive around and see all the decorated homes and then come home, eat and play games with our Granddaughter.

We love playing games and here is one game we bought, just recently, and are having a blast with it.  It's called Watch Ya Mouth!

You can find it at Amazon if you don't see it in the stores.  I'll attach a link to Amazon so you can see the game and watch the video.  Believe me, it's hilarious. I hope that family coming, tomorrow, find it just as funny as we do.

Watch Ya Mouth

Scroll down to the video!!!

Hope you have a wonderful day!!!

Hugs,
Char


Friday, December 23, 2016

Happy Anniversary!!!!


Today, we celebrate our 48th anniversary!!!  Where on earth did the time go??

When I look back on it, this was a hectic time to get married as your anniversary always gets swallowed up in all the Christmas activities. And, it's so hard to take a little vacation as Christmas is just two days away.

BUT, then again, what a wonderful time as it seems everything is decorated and for the most part, it's a happy time!

We are just playing it low key again, this year, and just going out for Chinese dinner with our Granddaughter.

Maybe afterwards, we'll drive around and look at Christmas lights!!

See ya tomorrow!!!

Hugs,
Char


Thursday, December 22, 2016

Sharing some Christmas FUN

I am truly sorry that I have been such a slacker at blogging!!!  I looked back over my posts and I realized (with a little nudge from a friend) that after my class on December 1st, I haven't posted.

I had had what I thought was a cold for over a week and thought that I was almost over it.  I did my class on December 1st, but by early evening, I just felt miserable...so off to urgent care we went and I found out I had bronchitis.

So, the meds and cough syrup he gave me helped a LOT and I was able to get some much needed sleep over the next couple of days.

On December 3rd, we drove up to WA(I slept a lot on the trip) and picked up our Granddaughter to come stay with us for the holidays.  We had heard we were in for some snow and didn't want to have to travel over the pass in snow.  As it was, going over, it started to snow...so on the way home we came back the long way, up the gorge and over The Dalles to Hwy 26 on the other side of the pass.

It's been a whirlwind of activity with her here.  We ended up getting snow a couple of days later and so we stayed inside and made crafts and I caught up a little on my Christmas card making.

We have been watching a ton of Christmas movies!!

We went to the Walk to Bethlehem, at our church in Redmond on Saturday 10th. She was fascinated with the animals and all the different scenes.

Then, we drove to downtown Redmond and took part in their "Charm Stroll". You donate some canned goods and/or personal hygiene items and they give you a 'passport' with the stores that are participating and as you go to each store and they give you a charm.


You have them stamp your passport with their letter...and when you are finished, it spells out a sentence.   Oh my gosh, we were over 3 hours doing this as you walk from one end of the downtown area all the way to the other side.  I got in over 7,000 steps just on the walk!  The snow was so bad and we tromped along the sidewalks mostly covered in snow except where some of the stores had shoveled it off!!

We topped off the day by going to a vendor market at Centennial Park and then we got an early dinner and headed for home.

FUN DAY!!!!


Thursday, December 1, 2016

Year End Close outs! Hurry while supplies last!


Year-End Closeouts
Click on the picture above to be taken to my website to check out the Closeouts!!!  Oh my gosh, so many great bargains!  And, some that are on sale even though they are in the Holiday catalog!!!  Still time to get them and make some cards.

The items not in the annual catalog are available while supplies last, so if you find something, get it quickly before it sells out.

Also, today, we as demonstrators, are able to pre-order for the Sale-A-Bration/Occasions catalog coming out next month.  :-)

All this and Christmas too!!!

I have class, today, so wanted to get this sent quickly so you can check out the bargains.

Happy December 1st!!!

Hugs,
Char


Tuesday, November 29, 2016

25% OFF Stamp Set Sales ends tomorrow plus new sale revealed and card share!

Wow!! The excitement never ends in the Stampin' Up! world. 

The Online Extravaganza sale just ended last night at midnight and the 25% OFF Stamp Set sale ends tomorrow night at midnight and the minute that sale ends the Stampin' Up! Year End Close Out sale will begin.

Save up to 60% off!! 

More details will come with the sale that launches December 1. Items will be "while supplies last" so you'll want to hurry. 

I'll send out details as soon as I get them. 

Still a bit under the weather with this silly cold I got on Thanksgiving, so haven't been stamping much except to be ready for my class on Thursday!  

I was able to attend another Demonstrator's class in Surprise, AZ when we were on vacation the first of November and thought I would share a card we made there.

She used the Detailed Floral Thinlits dies, Garden in Bloom and Kinda Eclectic stamp sets to create the card.


I really liked how easy this card was but so elegant!  

Hope you are having a great week!!!

Hugs,
Char


Thursday, November 24, 2016

HAPPY THANKSGIVING

Hi everyone,

I just wanted to wish  everyone a happy Thanksgiving!!!  Hope you are spending the day with family/friends. But, even if you aren't, like us, there is a lot to be thankful for!!!  All we have to do is just look for the blessings!!

Enjoy your day!!!

Hugs,
Char

Sunday, November 20, 2016

Online Extravaganza starts November 21st


Just a quick note to let you know about a great sale coming tomorrow!!!  Be sure to check out the 24 hour flash sales, too!

Check them out on my Stampin UP website:  http://www.stampinup.net/esuite/home/charwilson/


Thursday, November 10, 2016

Star of Light Side Stair Step Card

Simple!!!!  We love different card folds in class!

This month, we made a side step card using the Star of Light stamp set.  I just love this set and can't wait to play more with it and come up with even more ideas!!

We did a monochromatic theme using Tempting Turquoise and Shimmery White card stock and Tempting Turquoise ink.

Just add some sparkle with rhinestones and a little Wink of Stella and that's IT!!!

I want to try it using different color schemes, now!

OH so many stamps.....so little time till Christmas cards need to be OUT in the mail!!

Have a Fantastic day and remember to take time to PawsNStamp!

Char


Tuesday, November 8, 2016

Lovely as a Tree.....for Christmas

I don't know about you, but this is one of my most favorite stamps in the SU catalog.  We, as demonstrators, hold our collective breaths every time the new annual catalog is released and immediately look to see if it's still in the catalog!  I can't remember how many years it's been included in the catalog but I just know that I love it and use it all through the year!

Simple card but if you have a lot of Christmas cards to do, this stamp set is your 'friend'.

I used the Softly Falling Embossing Folder on the Whisper White card stock and stamping on the "unbumpy side, I then stamped over it.  IF you are using the bumpy side, then you will want to stamp prior to embossing your card stock.

Adding a little sparkle by using either Wink of Stella or your Fine Tip Glue pen and Dazzling Diamonds glitter.....you can make quite a few of these in no time at all.

And, you can even change up the color scheme!!!  

Have a great day!!!!

And, take time to PawsNStamp!!!

Hugs,
Char

Sunday, November 6, 2016

Did you turn your clocks back? Some interesting facts about Daylight Saving Time!

Daylight Saving Time

Did you know that it's Daylight Saving Time, not Daylight Savings Time, like so many of us always seem to say?

Here are some other interesting facts that have NOTHING whatsoever to do with stamping or card making.

Springing forward and falling back may seem simple enough, but daylight saving’s history has actually been quite complex—and misconceptions about it persist today. As you prepare to reset your watches, alarms and microwaves, explore eight facts about daylight saving time that might surprise you.

1. It’s “daylight saving time,” not “daylight savings time.” 
Many people render the term’s second word in its plural form. However, since the word “saving” acts as part of an adjective rather than a verb, the singular is grammatically correct.
2. Though in favor of maximizing daylight waking hours, Benjamin Franklin did not originate the idea of moving clocks forward. 
By the time he was a 78-year-old American envoy in Paris in 1784, the man who espoused the virtues of “early to bed and early to rise” was not practicing what he preached. After being unpleasantly stirred from sleep at 6 a.m. by the summer sun, the founding father penned a satirical essay in which he calculated that Parisians, simply by waking up at dawn, could save the modern-day equivalent of $200 million through “the economy of using sunshine instead of candles.” As a result of this essay, Franklin is often erroneously given the honor of “inventing” daylight saving time, but he only proposed a change in sleep schedules—not the time itself.
3. Englishman William Willett led the first campaign to implement daylight saving time.
While on an early-morning horseback ride around the desolate outskirts of London in 1905, Willett had an epiphany that the United Kingdom should move its clocks forward by 80 minutes between April and October so that more people could enjoy the plentiful sunlight. The Englishman published the 1907 brochure “The Waste of Daylight” and spent much of his personal fortune evangelizing with missionary zeal for the adoption of “summer time.” Year after year, however, the British Parliament stymied the measure, and Willett died in 1915 at age 58 without ever seeing his idea come to fruition.
4. Germany was the first country to enact daylight saving time. 
It took World War I for Willett’s dream to come true, but on April 30, 1916, Germany embraced daylight saving time to conserve electricity. (He may have been horrified to learn that Britain’s wartime enemy followed his recommendations before his homeland.) Weeks later, the United Kingdom followed suit and introduced “summer time.”
5. Daylight saving time in the United States was not intended to benefit farmers, as many people think. 
Contrary to popular belief, American farmers did not lobby for daylight saving to have more time to work in the fields; in fact, the agriculture industry was deeply opposed to the time switch when it was first implemented on March 31, 1918, as a wartime measure. The sun, not the clock, dictated farmers’ schedules, so daylight saving was very disruptive. Farmers had to wait an extra hour for dew to evaporate to harvest hay, hired hands worked less since they still left at the same time for dinner and cows weren’t ready to be milked an hour earlier to meet shipping schedules. Agrarian interests led the fight for the 1919 repeal of national daylight saving time, which passed after Congress voted to override President Woodrow Wilson’s veto. Rather than rural interests, it has been urban entities such as retail outlets and recreational businesses that have championed daylight saving over the decades.
6. For decades, daylight saving in the United States was a confounding patchwork of local practices.
After the national repeal in 1919, some states and cities, including New York City and Chicago, continued to shift their clocks. National daylight saving time returned during World War II, but after its repeal three weeks after war’s end the confusing hodgepodge resumed. States and localities could start and end daylight saving whenever they pleased, a system that Time magazine (an aptly named source) described in 1963 as “a chaos of clocks.” In 1965 there were 23 different pairs of start and end dates in Iowa alone, and St. Paul, Minnesota, even began daylight saving two weeks before its twin city, Minneapolis. Passengers on a 35-mile bus ride from Steubenville, Ohio, to Moundsville, West Virginia, passed through seven time changes. Order finally came in 1966 with the enactment of the Uniform Time Act, which standardized daylight saving time from the last Sunday in April to the last Sunday in October, although states had the option of remaining on standard time year-round.
7. Not everyone in the United States springs forward and falls back. 
Hawaii and Arizona—with the exception of the state’s Navajo Nation—do not observe daylight saving time, and the U.S. territories of American Samoa, Guam, Puerto Rico, the Virgin Islands and the Northern Mariana Islands also remain on standard time year-round. Some Amish communities also choose not to participate in daylight saving time. (Around the world, only about one-quarter of the world’s population, in approximately 70 countries, observe daylight saving. Since their daylight hours don’t vary much from season to season, countries closer to the equator have little need to deviate from standard time.)
8. Evidence does not conclusively point to energy conservation as a result of daylight saving.
Dating back to Willett, daylight saving advocates have touted energy conservation as an economic benefit. A U.S. Department of Transportation study in the 1970s concluded that total electricity savings associated with daylight saving time amounted to about 1 percent in the spring and fall months. As air conditioning has become more widespread, however, more recent studies have found that cost savings on lighting are more than offset by greater cooling expenses. University of California Santa Barbara economists calculated that Indiana’s move to statewide daylight saving time in 2006 led to a 1-percent rise in residential electricity use through additional demand for air conditioning on summer evenings and heating in early spring and late fall mornings. Some also argue that increased recreational activity during daylight saving results in greater gasoline consumption.
  • Author

    Christopher Klein
  • Website Name

    History.com
  • Year Published

    2012
  • Title

    8 Things You May Not Know About Daylight Saving Time
  • URL

    http://www.history.com/news/8-things-you-may-not-know-about-daylight-saving-time

Saturday, November 5, 2016

Fun at Class

I love the ladies that come to my class.  They put up with my shenanigans and silliness and are so patient with me when I forget stuff and have to go back to my stamp room to retrieve it.

That is one of the things that I always get so irritated about, though, is the many times I have to walk back to my stamp room to retrieve something I had forgotten to include in the kits.  (Good thing it's held at my house, huh?)

So, I decided to make a game out of it....and hopefully make it fun for them, since they are so patient.  I handed them each a slip of paper, had them 'guess' at how many times I would have to make that trip back to my stamp room and then someone kept count.  The one closest to the times I made the trip, got a prize.

Now, I look at this in a different way.  I see it as getting 'my steps in' on my Fitbit, but it does interrupt things so that's why it irritates me that I do it.  But, regardless of how many times that I go over and over and over the contents of the shoeboxes, I invariably forget something!!  It is what it is!!

It got to be so silly with some of them asking for things that weren't part of the class....like a different color of ribbon or asking to 'see' something that they knew I didn't have out.  LOL  Like I said, I love my girls!!! They just got right into the mix of things and made it fun!!

Well, I did good...only made 5 trips this month!!!  Two of the gals guessed 5.
But, I decided that since they were all such great sports, they all deserved a prize.

We did 3 cards at class on Thursday.  I'll share the other two in upcoming posts.

The one above was one they wanted to learn how to do.  And, when they express that they want to learn how to do something, I try my hardest to give them what they want.

This card used the Color Wash technique, using water color paper, reinkers and stippling brushes.

Oooooooh, the different colors the gals came up with were so cool!!!  No two were alike.

I wish I had thought to take photos of their creations!!

Thanks for stopping by!!!

Remember that the Stitched Framelits are available this month!!!  Can't wait to get my hands on mine!!

Hugs,
Char

Wednesday, November 2, 2016

Masculine Birthday Card and new Promotion


October 28th, 1966 was the day our eldest Son was born.  50 years ago!!!  Where does the time go and I don't know how that can be humanly possible as I am not much older than that, myself!!  But, the hard facts are.....I AM!

I made this card for our Son's birthday.  He surprised us by driving the 3 hours to our house and spending the night and a portion of the next day.  SO enjoyed our visit!!!

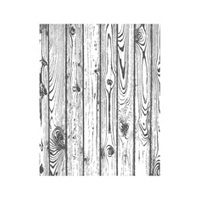
This card is basically pretty simple to do but really looks unique.  I just used the Gorgeous Grunge 'splat' stamp and stamped on the Woodland embossing folder with Mint Macaron, Crushed Curry and Cajun Craze.   Then, I ran it through the Big Shot.  I chose the Elk stamp set from The Wilderness Awaits and just left it au natural....didn't even color it.

Have a great day!!!

Hugs,
Char

Tuesday, November 1, 2016

Stitched from the Heart!!! Brand new Framelits!!!

Today, is the day!!!  Stampin' UP is releasing their new Stitched Framelits for one month, only!  Then, they will be re released in the brand new annual catalog this June!

Watch the video below.


Along with the framelits, SU is offering several of it's sets at a discount for this month only.  If you haven't gotten them yet, now is your chance to save a little money and get the stitched Framelits!

ITEMDESCRIPTIONRETAIL PRICESALE PRICE
145372Stitched Shapes Framelits Dies-Set Of 12 Dies Which Includes Four Circles, Ovals, And Squares$30 USD/$40 CADNo Discount
142069 (HC P. 11)Greetings From Santa Wood-Mount Stamp Set$27 USD/$35 CAD$20.25 USD/$26.25 CAD
143269 (HC P. 11)Greetings From Santa Clear-Mount Stamp Set$19 USD/$25 CAD$14.25 USD/$18.75 CAD
142114 (HC P. 15)Hang Your Stocking Photopolymer Stamp Set$21 USD/$26 CAD$15.75 USD/$19.50 CAD
142049 (HC P. 19)Christmas Pines Photopolymer Stamp Set$35 USD/$43 CAD$26.25 USD/$32.25 CAD
142142 (HC P. 23)Merry Mice Wood-Mount Stamp Set$23 USD/$30 CAD$17.25 USD/$22.50 CAD
142145 (HC P. 23)Merry Mice Clear-Mount Stamp Set$17 USD/$22 CAD$12.75 USD/$16.50 CAD
142180 (HC P. 33)Tin Of Tags Photopolymer Stamp Set$21 USD/$26 CAD$15.75 USD/$19.50 CAD
142206 (HC P. 43)Suite Season Wood-Mount Stamp Set$28 USD/$36 CAD$21 USD/$27 CAD
142209 (HC P. 43)Suite Season Clear-Mount Stamp Set$20 USD/$27 CAD$15 USD/$20.25 CAD
140386 (AC P. 31)Oh, What Fun Photopolymer Stamp Set$21 USD/$26 CAD$15.75 USD/$19.50 CAD
141859 (AC P. 61)Baby Bear Photopolymer Stamp Set$26 USD/$32 CAD$19.50 USD/$24 CAD
141784 (AC P. 139)Blooms & Wishes Photopolymer Stamp Set$21 USD/$26 CAD$15.75 USD/$19.50 CAD
Contact me if you would like to purchase any of these products or you can visit my online store at http://charwilson.stampinup.net 


Have a great day!!!


Char

Monday, October 31, 2016

Happy Fall Inspiration hunting!!!


HAPPY FALL
and Finding inspiration!!

I know I have said it many times, FALL is my favorite time of the year.  Well, except when it's cold and foggy or rainy :-)  Then, not so much.  But, even then, it's a good time to hunker down in the craft room and 'play'.

How do you get new ideas for cards?  I get asked that a lot.  Well, I spend a lot of time on the computer searching Pinterest and other places for ideas.  Some days, the ideas just flow from my brain without much coaxing but other times, I need a little 'jump start' to get the ideas flowing.

That's when I head to Pinterest and just sit there looking at hundreds and hundreds of card ideas.

Some days, I am not even looking at cards, but other crafts to do and all of a sudden a card will surface in my head!

One day I was looking through Pinterest for Fall decorations and came across an idea for a scarecrow made out of wood pallets.

Aren't these cute?  And, if you go looking for wood pallets, snowmen, Santa, scarecrow....just about anything, you'll come up with a lot of ideas!!

The first one I saw, looked more like the card below....and that is the card that I made to look like the pallet I saw.  But, when I went back to 'find' the first pallet that I had originally seen, I couldn't find it.  Go figure, huh?

I didn't quite like the way the card turned out with the card peeking through on the sides and bottom, so I went back to Pinterest in search of that other pallet but no success.

And, I found one similar to the one above but different colors and it sent me to a website for the directions for making it. So, I made the one below.

Now, I want to redesign my original one (I thought it was original...lol) using the directions I found for the above scarecrow, but I haven't had time to go play with my original Scarecrow since.  I am knee deep in Christmas cards for a Christmas class.

Where do you find your inspiration??  I recently was perusing a catalog and came across this page.  I thought to myself, that matches some SU card stock.  And, sure enough, it did!  I went to my craft room and pulled out Blackberry Bliss and Crushed Curry.  Now, "I" would have probably thought to put those two colors together but they go together beautifully!!

So, keep your eyes open, you never know where you'll find inspiration for card ideas or colors to use together.

Have a Fantastic Day!!!!

Hugs,
Char


Tuesday, October 25, 2016

Halloween Pumpkin Treats


These were the cute little make n takes we did at the Big Shot Workshop on Friday, October 7th.

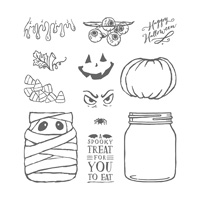
You can also use the same stamp set and do a mummy treat box.

They are so easy to do and you can have quite a few ready for those special little Trick or Treaters that come to your door!

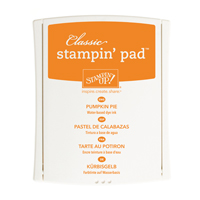
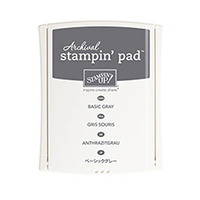
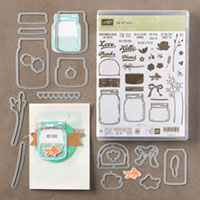
Using Pumpkin Pie card stock, cut out two medium size jars and then stamp them with the Hardwood stamp using Pumpkin Pie ink.  Also stamp two jar lids in Basic Gray and cut them out using the jar lid framelit.   Highlight the jar lids using the Gold Wink of Stella pen.

Stamp the pumpkin face using Basic Black ink on one jar. Highlight the eyes and mouth with the Gold Wink of Stella pen.

Add the jar lids to the pmpkin jars.

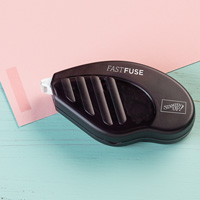
Create the little inside box for your Hershey Nuggets. Using a 3 1/2" x 3 piece of Pumpkin Pie Card stock, and with the 3 1/2" side at the top of your scoring tool, score at 1" and 2 1/2".  With the 3" side at the top of your score board, score at 1" and 2".  Cut on the score lines up to the fold line on each of the folds on the 3 1/2" side.  Put your box together using Fast Fuse Adhesive.  Add your treats to the box.  I used 2 Hershey Nuggets but you could use any candy of the same size.

Then, adhere your pumpkin die cuts to the outsides of the box using Fast Fuse Adhesive.

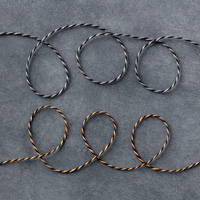
Using the Halloween Night Baker's Twine, wrap around top of pumpkin and tie a bow.

You can secure the top of your jar lids with a little snail adhesive to keep it closed.  NOT that it will stay that way long :-)

Have fun making these adorable treats!!!

I am listing the supplies used below!


Sunday, October 23, 2016

Bells and Pine bough Christmas Card

I know, I know, it's too early for Christmas....and I don't even want to see the decorations and music in the store before Thanksgiving but when you are a demonstrator, you have to be ahead of the game.

This is a card I saw and then redesigned it using different elements, but decided not to do it in class. So, I am sharing it here.

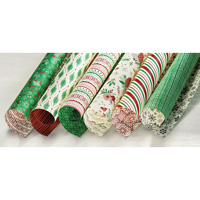
I used Cherry Cobbler, Garden Green and Very Vanilla card stock and also the This is Christmas DSP (I love this paper).

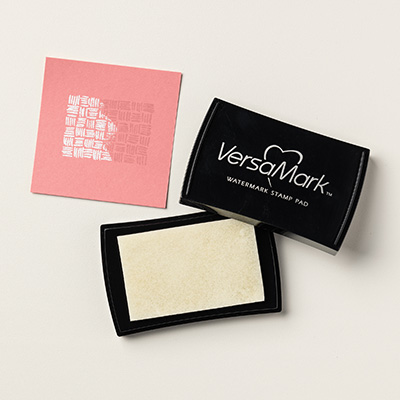
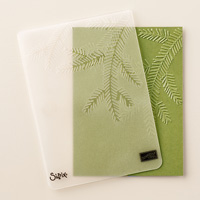
I stamped the bells with Versamark and embossed them in gold ep and fussy cut them out.  Using the pine embossing folder, I embossed a piece of WW and then used a sponge dauber to lightly go over it with Garden Green ink.

Stamp and emboss your sentiment with gold embossing powder onto a piece of Whisper White card stock and cut out with the Bunch of Banners Framelits.  Attach to the card.

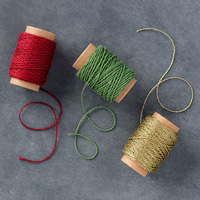
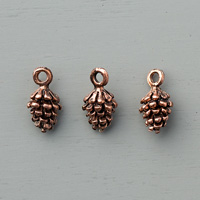
Then, add the bells with the Baker's Twine trio (only using red and gold) and attach it with the Mini pine cones.

You can find all the products I used at the end of this blog post.

I'll be sharing more Christmas cards and also Fall cards in the upcoming days.

Have a great day!!!
Char


Table built using Product Table Builder by The Crafty Owl - Independent Stampin' Up! Demonstrator.

Thursday, October 20, 2016

Stamp Class and Recipe!!

Today was our Christmas Stamp class.  I decided to have it early so that the gals could get a head start on their Christmas cards.

Here is one of the 6 cards that we made today!  

They had a great time and so did I!!

We had a nice lunch, afterwards, as one of the gals brought Croissants and Chicken Salad for lunch and I made a dessert.  They asked if I would share the recipe on my blog, so here it is.

BUTTERSCOTCH DELIGHT
1 1/3 c. flour
3/4 c. chopped nuts
3/4 c. margarine or butter
3 oz cream cheese
1 c. confectioner's sugar
9 oz Cool Whip
1 Pkg. small instant butterscotch pudding
1 Pkg. small instant coconut pudding
3. c. Milk
9 oz container Cool Whip
1 c. chopped nuts or toasted coconut

Mix flour, 3/4 c. chopped nuts and butter.  Press into 9x13 pan.  Bake 15 minutes at 350º.  Cool

Cream together cream cheese, confectioner's sugar and add 1 (9 oz) container Cool Whip. Spread over cooled crust.

Mix together puddings and milk, stir with whisk until thick.  Spread over cream cheese layer.  Add 1 (9 oz) container of Cool Whip on top and top with chopped nuts or toaster coconut.

ENJOY!!!!


Sunday, October 16, 2016

Yet another Fall card

My inspiration for this card came from a SU demonstrator in Germany.  You can check out her blog, here.  When you go check it out, leave her a comment and tell her Char sent you!!  :-)

Anyway, I saw it on her blog and couldn't quite figure it out, so I wrote her and asked and she kindly gave me the directions.

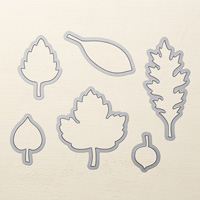
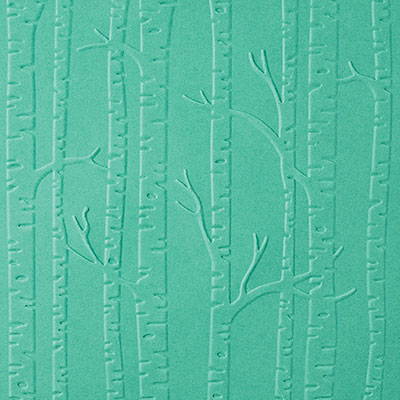
So, I am sharing them with you!!  Basically, you brayer Soft Suede ink onto the Woodland EF on the side that is not raised.  THEN, you cut a leaf using the Leaflits Framelits and place that inside your embossing folder and run it through your Big Shot.

Using the Leaflits Framelits, again, you then cut out another Maple leaf from a piece of 4 x 5 1/4" Whisper White card stock and layer that onto your 81/2 x 5 1/2 Crumb Cake card and then 'fit' your 'cut out' leaf inside.

Stamp a sentiment onto a piece of Crumb Cake card stock, and layer it onto a piece of Early Expresso card stock. I also used a strip of the Neutrals Designer Series Paper.

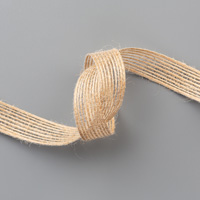
The bow was made using the 5/8" Burlap Ribbon but just removing one thread from the ribbon.  FUN way to get some sturdy thread to make a bow.

The embellishments at the top of the card are the Metallic enamel shapes.

FUN card to send for Fall birthdays!!!

Thanks to Christina from Germany for sharing with me how she created this card!!

If you haven't gotten the Leaflet Framelits or the matching stamp set, it is a MUST HAVE!!!  It is one of my favorite sets in the catalog.

Have a great day!!!

Char

Table built using Product Table Builder by The Crafty Owl - Independent Stampin' Up! Demonstrator.

Saturday, October 15, 2016

My Favorite time of year

Fall is my most favorite time of the year!!  It's probably because it follows summer which is my least favorite!  And, that is only because it gets so warm in the summer months and I am more of a cool weather person.

Actually, I love all the seasons of the year for their own differences.
But, Fall being my FAVORITE, I tend to make more cards at this time of year than any other.

This card was FUN to make.  First, I made the leaves using watercolor paper, re-inkers and SU Aqua Painters.

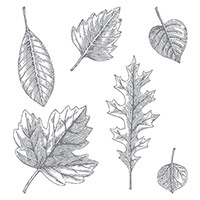
After the paper dried, I then used the Vintage Leaves to stamp my leaves and the Leaflits Framelits to die cut them.  On the larger leaf, I stamped a tree from the stamp set, Sheltering Tree to give it a 'veiny' look.  (if that's a word)
I used the Woodland embossing folder and lightly brayered Soft Suede ink onto the trunks of the trees...making sure I brayered the 'raised' side.  Then, I ran it through my Big Shot.   I stamped the smaller leaves from the set "Among the Branches" in a combination of Soft Suede and one of the greens....sorry, I didn't take note when I did that.....something I am really bad about doing, sometimes.

I'll be sharing more Fall cards in the upcoming days although I am already working on Christmas cards.....weird, huh?  But, my Christmas class is this Thursday because my customers wanted to get an early start on them.

Thanks for stopping by!!!  And, if you would be so kinds as to leave a comment so that I know you were here, I would appreciate it so much!

If you have any questions, don't hesitate to ask!  

Have a great day!!

Char